
It is that time of the year again when we’re getting our sites up and running and matching our Blackboard configuration to our teaching plans. Groups are best set up after the start of semester because the student lists are not populated before semester and there can be a lot of movement in the first week or so due to changing student enrolments. Groups are an incredibly useful tool in Blackboard and their use extends beyond getting students working together.
Below we’ll go over how to configure the different group options and how you can use them to support your teaching. Groups are an efficient way to organise your students in Blackboard. You can create and assign quizzes, formative assignments, and have differentiated discussion boards visible only to group members and staff or send emails only to students in a particular group.
Our first step is to establish the purpose for our groups:
Groups can be used for administration and/or for student activity. Rather than approach this from a technological standpoint, we’ll break it down by how you’re likely to use them.
Tech Tip
For student-facing groups, they need to be built on the 'back end' in the control panel and deployed on the 'front end' for students to access. This means building a Tool Link to your groups in your Content AreaCourse administration uses – streamline navigation and communication
The best use of groups for administrative purposes allows you to better navigate your Blackboard Grade Centre and to communicate with your students. You can break them down by their tutorial groups, their working groups for collaborative work, or by any other structural means to facilitate Smart Views in your Grade Centre and to allow for communication to particular groups of students.
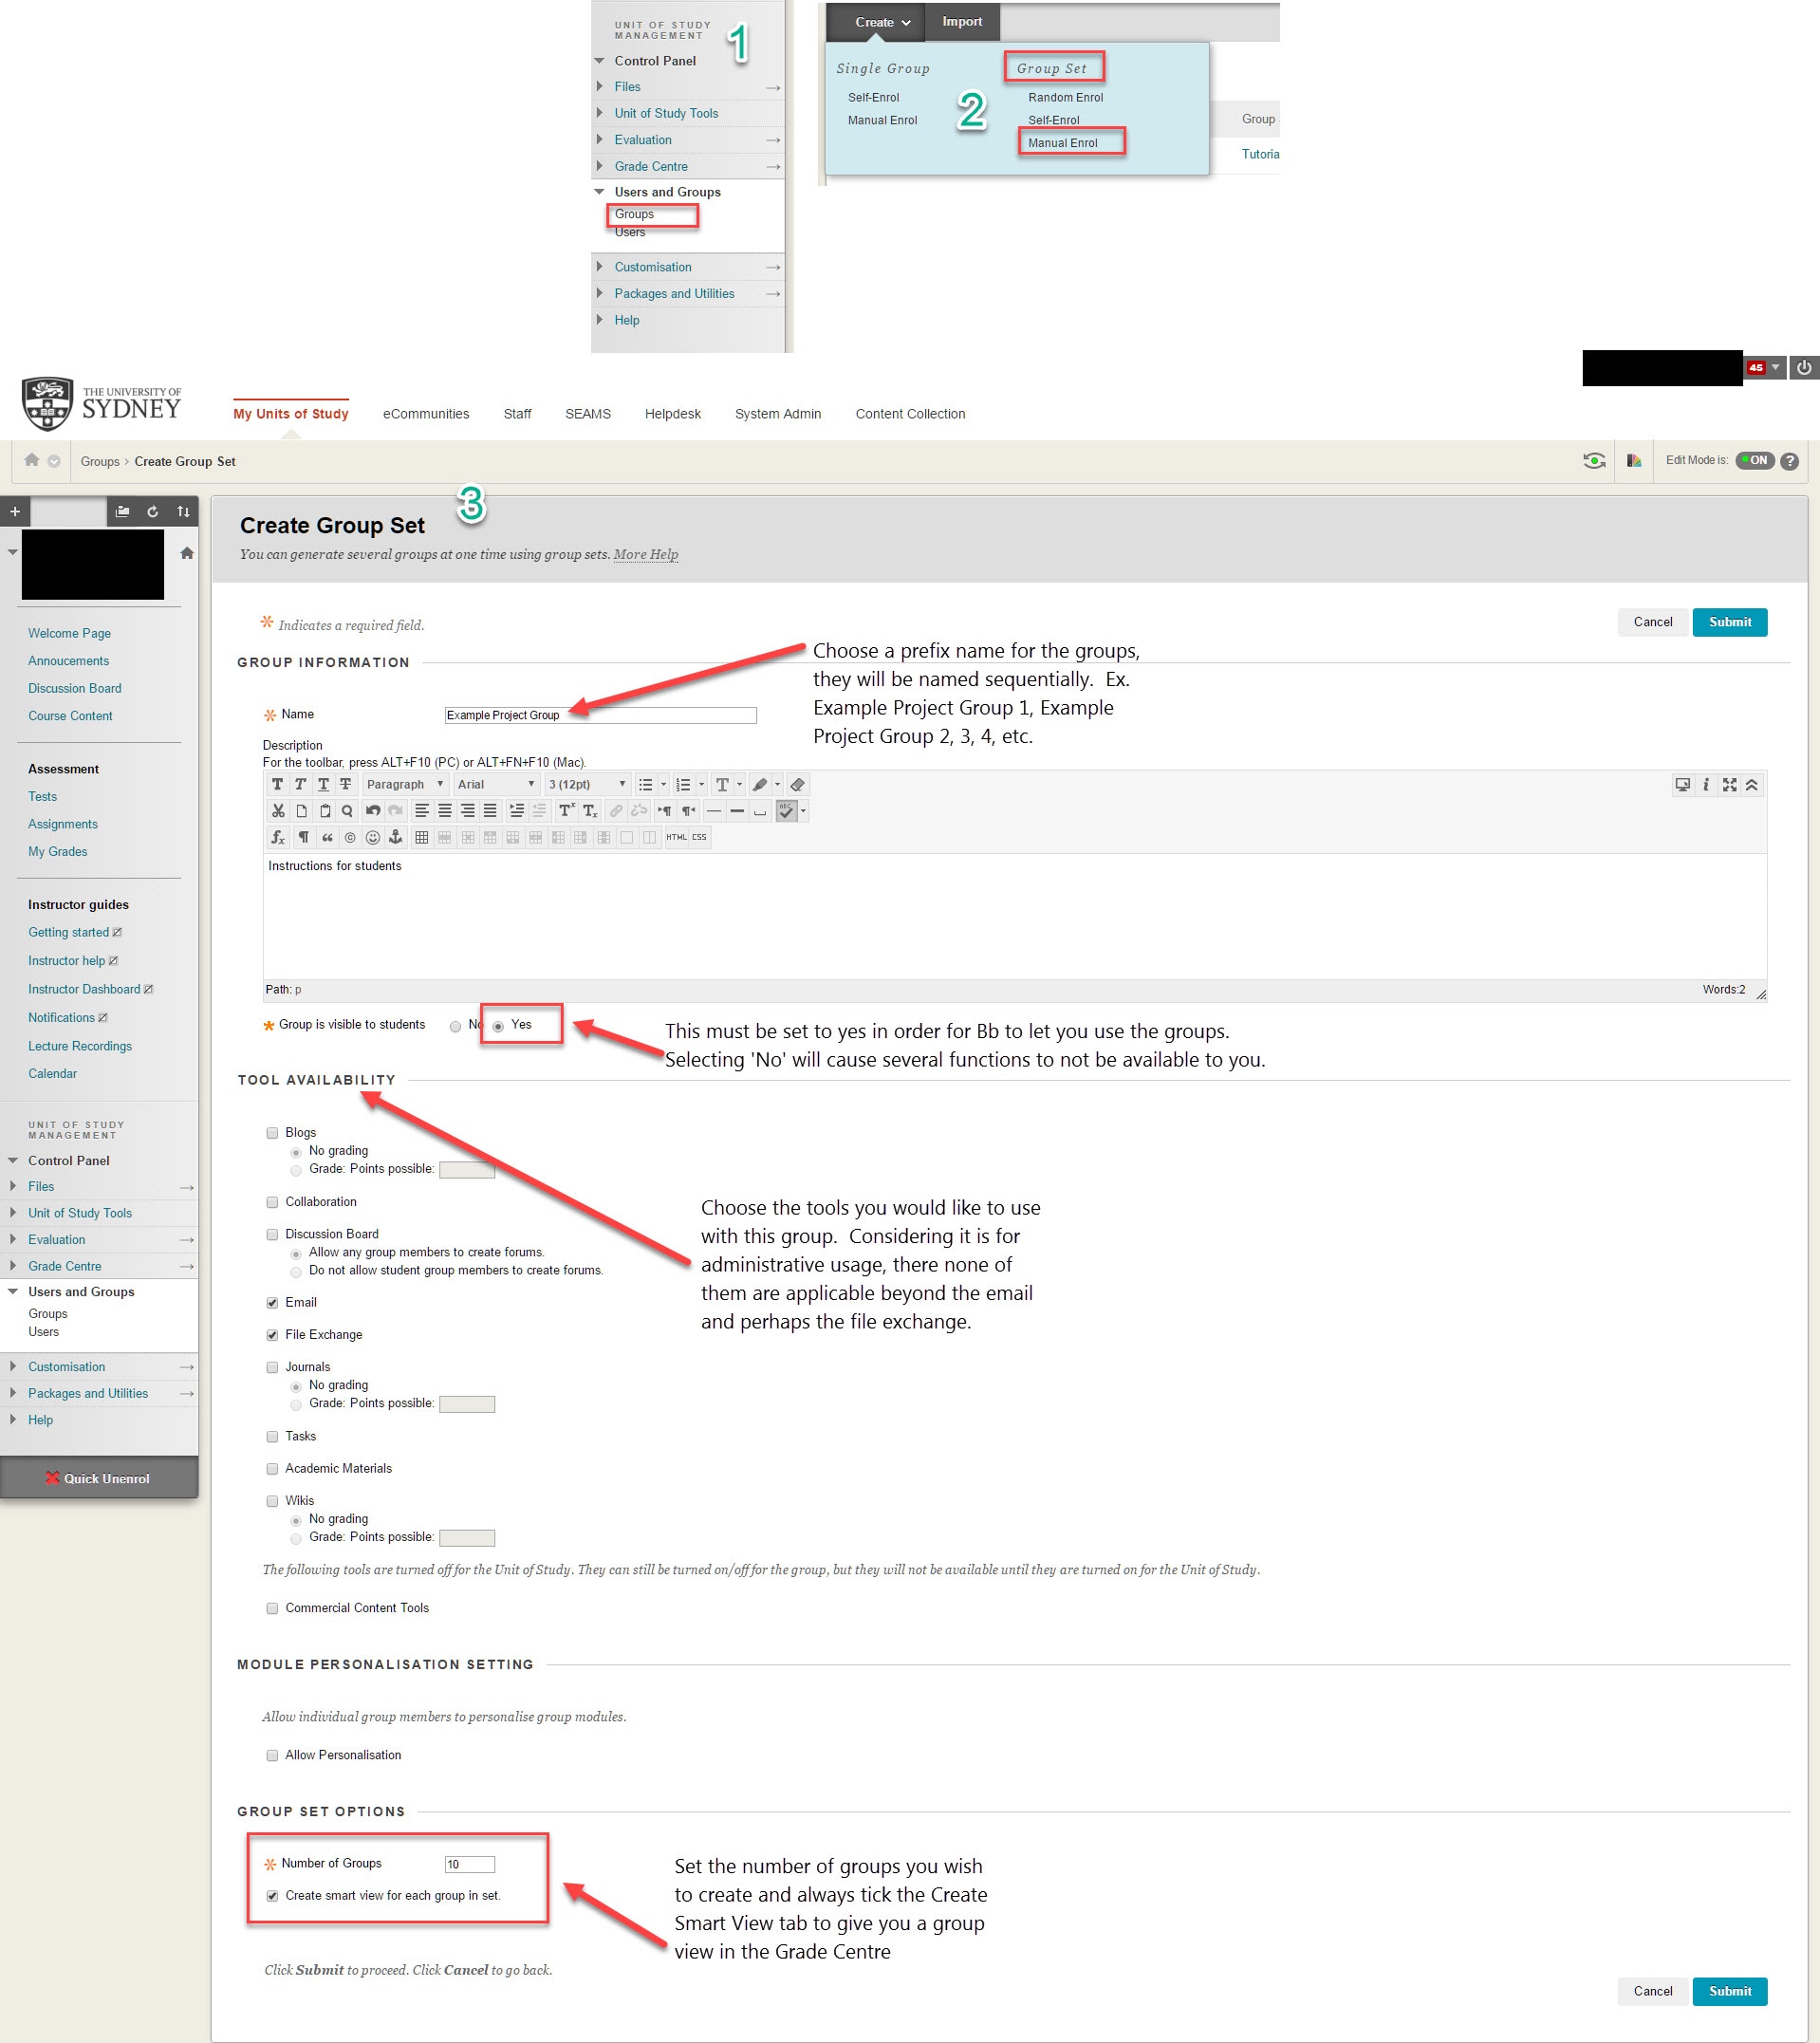
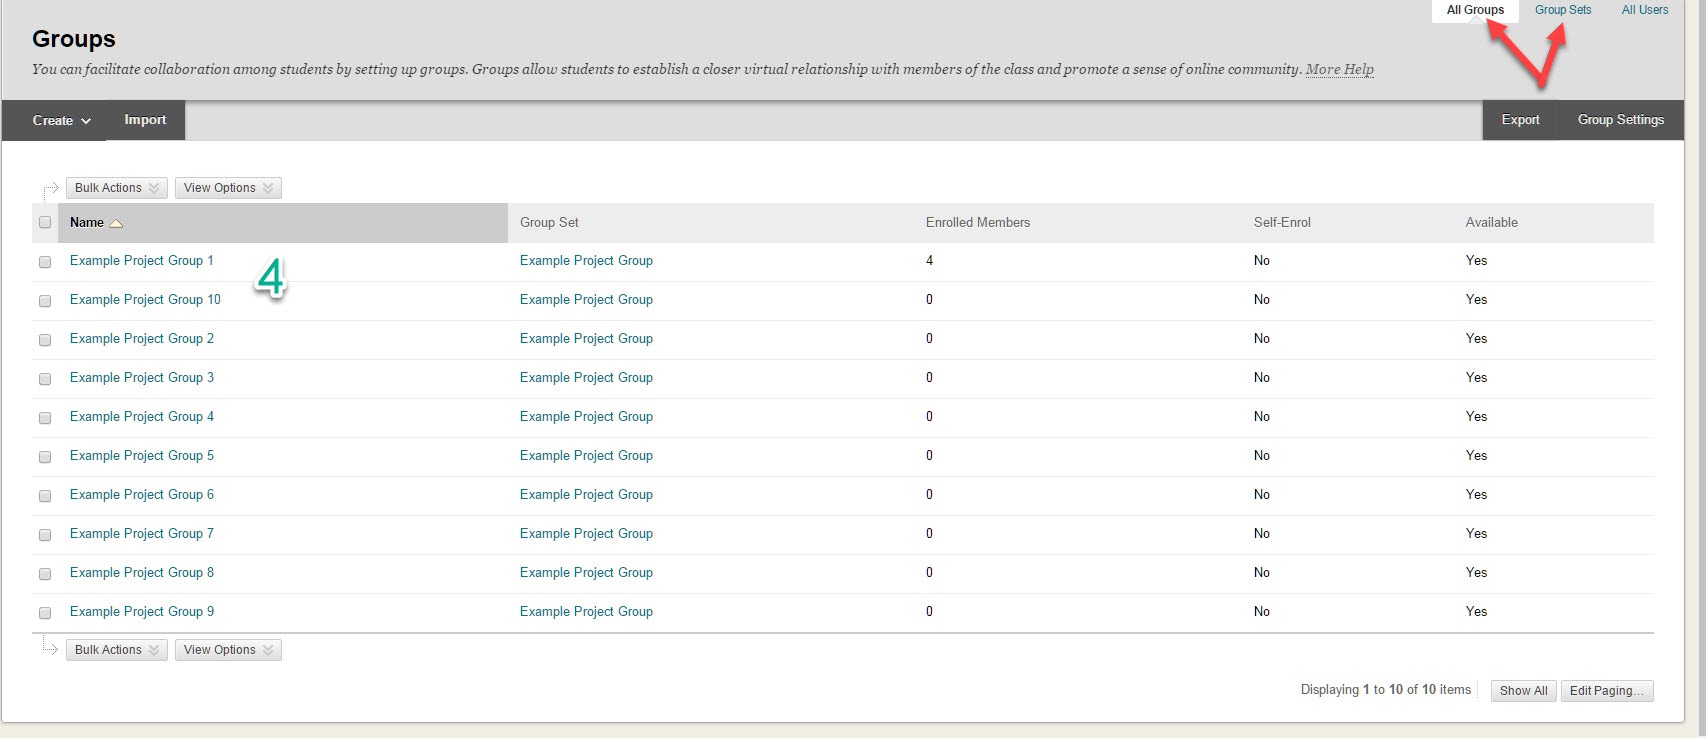
To set this up it is recommended to always use the Group Set –> Manual Enrol group creation option. I’ve included some videos and screenshots below.
Populate the groups with students
You have an option at this point about how you wish to populate the student lists. If you have 100 or fewer students, it is practical to use Blackboard’s ‘Add Member’ tool, but I find it is easier to import them from a CSV (comma-separated values) file (which you can save from Excel). The only thing you’ll need is the name of the group, exactly as you’ve entered it into Blackboard, and the students’ unikeys; don’t worry about entering the name fields or their SIDs.
Here is a template file: template – Bb Group Set – Student Member Upload.
This is the only tedious part of setting up your groups, and unfortunately at some point you’ll have to build your list of students. It can be done inside Blackboard or in an Excel file or on a piece of paper, but in order to populate your groups with students you’re going to have to have some record of who is in what group. The list of students can be exported from the Grade Centre or downloaded from timetabling to get you started; I think timetabling even exports tutorial group lists.
I’ve made a quick video of the process of importing a list of students below.
Groups for student activity – managing groupwork and assessment
Groups for group work and assessment – This is the most common usage of groups in Blackboard at the University by far, and is usually created using Group Sets. Group Sets are collections of groups you can create in one go. If you wish to make 350 groups with a few clicks on one screen, Group Sets is how you do this in Blackboard. At the end of this post, there is a note on when Single Group creation may be useful.
Here we come to another fork in the technological road, based on how we want to populate our groups with students. There are three options available in Blackboard:
Manual Enrol
If you are creating groups based on tutorial times or lab sessions, it makes sense for you to choose the groups because the list of students is fixed. Many instructors also use a blended approach and allow students to sign up in class or assign work to students in person. Whatever the case may be, if you have a fixed list of student groups you wish to create in Blackboard, then the Manual Enrol option is the best way to ensure fidelity to your group lists. If you set groups in class and then let students ‘Self Enrol’ to those groups in Blackboard, then you’ll always have a few students who don’t sign up to their group or sign up to the wrong group which will make the Grade Centre a headache while you search for those students; there are always a handful who will struggle to follow instructions.
Self Enrol
Often groups are self-selected by students based on assignment topics, lab sessions, or social choice. This approach can be used for collaborative work or it can also be used to distribute topics for individual work, functioning as a signup sheet only for a non-group purpose. You can use some clever structural setup of your group names and the Self Enrol option to get the students to take care of populating their information in Blackboard.
This is a good way to avoid working outside Blackboard with Excel spreadsheets to create your group lists or using the mediocre built-in tool to select from a list of students for each group. If the composition of the groups isn’t particularly important for your teaching outcome, then we’d recommend using ‘Self Enrol’ to save yourself time on administration and to empower your students with a sense of choice. As per above, making sure every student actually join a group can be a bit of a challenge, but if it is linked to an assessment, there is generally a high compliance rate.
Random Enrol
This one is exactly what it sounds like. It will randomly and evenly split the students across the number of groups you specify. The only caveat with this is that students will need to check online and then find each other in class, which can be a challenge for large cohorts, so administering it can take up some additional class time.
As with any online learning tool, its use needs to support your teaching and relate back to the classroom or student learning in order to be relevant. ‘Random Enrol’ tends to be difficult to use for true collaborative work because it will invariably assign students into groups who are not in the same tutorial group. ‘Random Enrol’ pairs well with topic or fieldwork assignments where student selection is not desired.
Here I’ve taken a few key screenshots and made a video of the setup for the ‘Self Enrol’ Group Set. (The ‘Manual Enrol’ process was shown above.) Setting up the ‘Random Enrol’ Group Set is very similar to ‘Manual Enrol’.
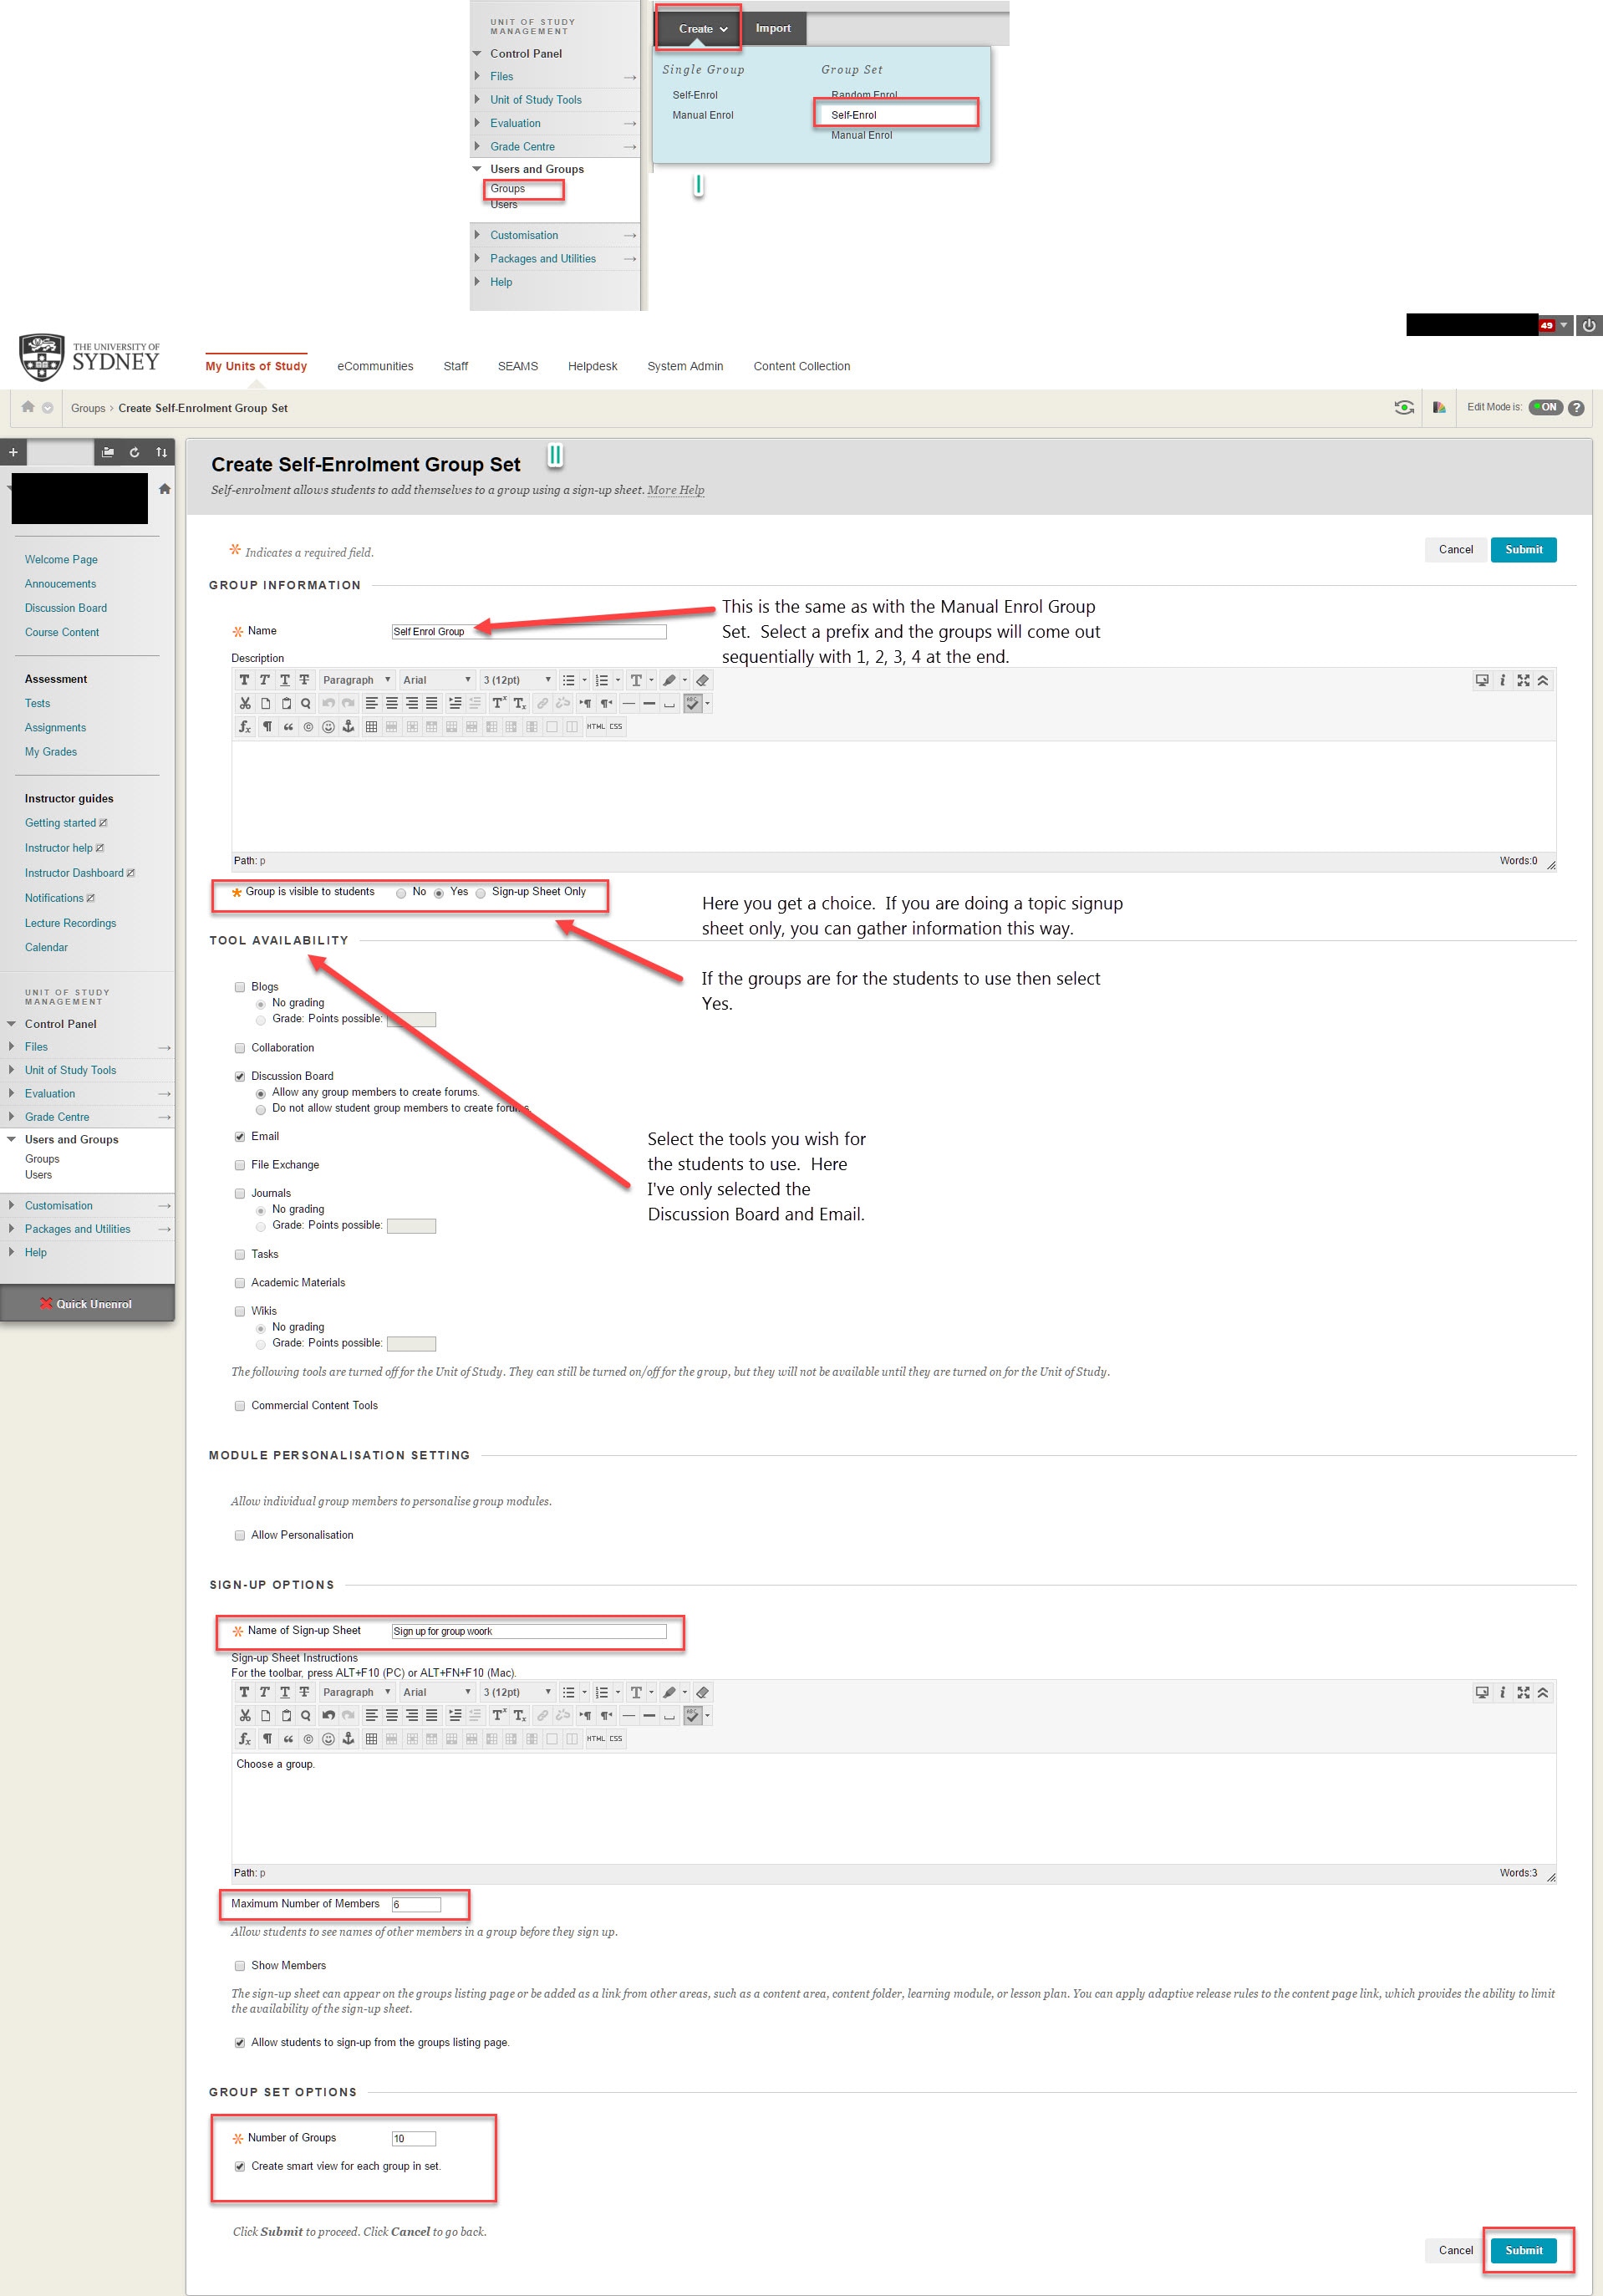
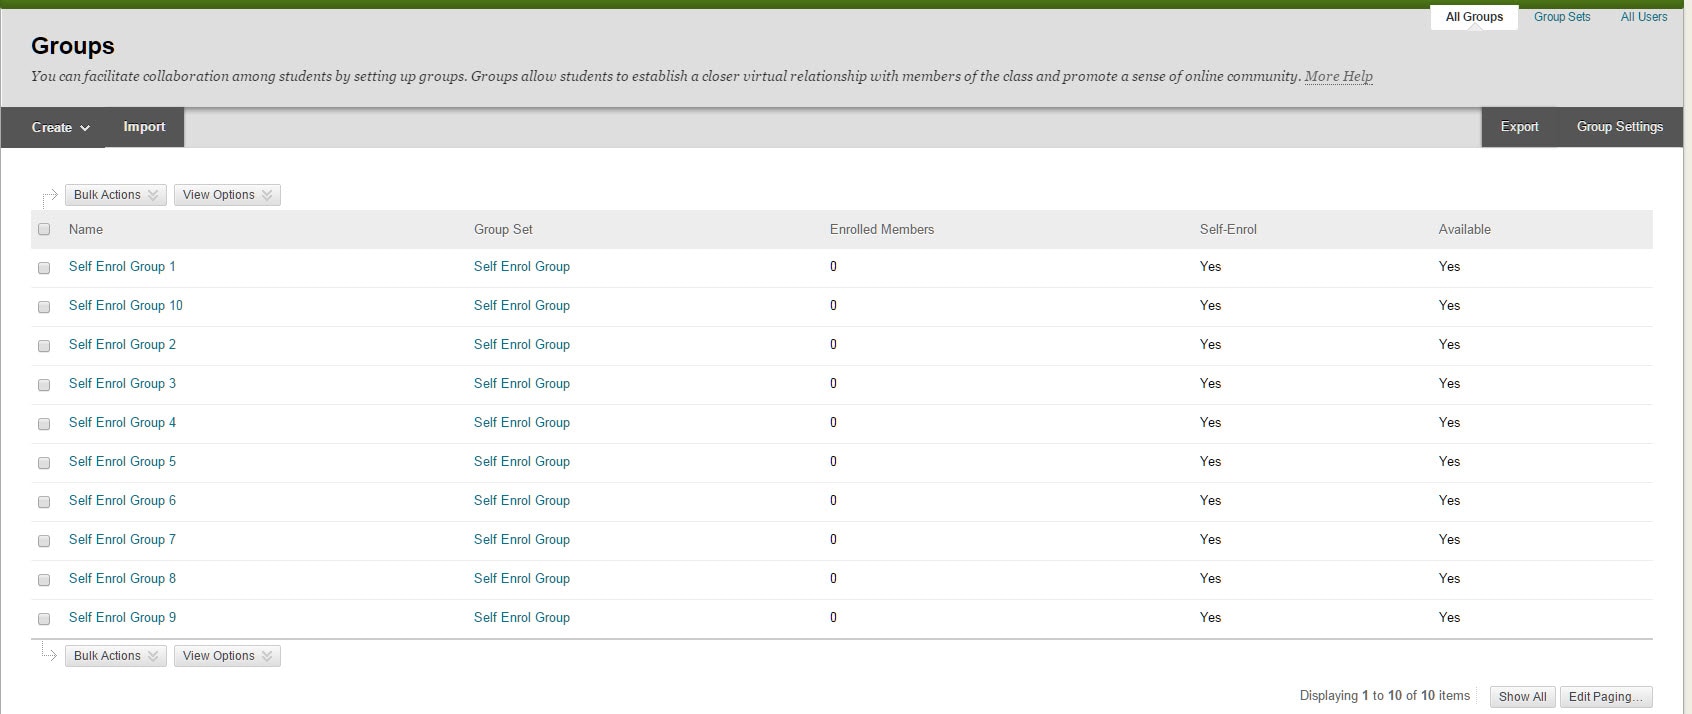
Setting up ‘Self Enrol’ Group Sets is far simpler than the ‘Manual Enrol’ option. The only thing to do to populate your ‘Self Enrol’ groups is to send out a notification/announcement and remind students in class. Here is a quick video showing how the ‘Self Enrol’ setup will look like:
A final note on creating groups one by one (instead of creating Group Sets)
If you are creating only a handful of groups, then creating ‘Single Groups’ may work for you. It has Self Enrol and Manual Enrol, but no Random option for obvious reasons. This can be useful for Self Enrol in that students are able to sign up to more than one group. In the Group Set, created groups are all linked and a student can only join a single group of a Group Set. If you have a signup sheet for fieldwork or other offsite excursions and students had to say attend 2 out of 5 options, then you could use a series of Single Groups created Self Enrol groups to accomplish this.